Wine storage structures come in various kinds and sizes. Each one needs a different kind of refrigeration system, depending on certain factors, such as bottle capacity, room dimensions, and regional climate. M&M Cellar Systems, one of our partners in the wine cellar cooling industry, has extensive experience in setting up all kinds of refrigeration systems. In this article, they take us through their step-by-step process of how to install a split system cooling unit.
What is the Role of a Wine Cellar Cooling Technician?
Mario Morales, the owner and lead technician at M&M Cellar Systems, says that a technician’s role goes beyond just being the installer of refrigeration equipment. We, at Wine Cellar Cooling Services Miami, agree 100% with him. A good technician is one who is capable of assessing and evaluating a wine storage structure so that he or she can give an expert recommendation of what cooling system is most fit for the space.
Recently, Mario and his team worked on a project in Los Angeles where they were to install a refrigeration system for a residential wine cellar. After a thorough assessment, he and his team recommended and installed a split system cooling unit.
Why Was a Split System Cooling Unit the Most Appropriate Refrigeration Equipment for this Los Angeles Project?
There are various factors considered when selecting refrigeration equipment for any wine storage facility. Mario and his team chose a split system cooling unit for the residential wine cellar in Los Angeles because of the following:
1. There was No Adequate Space Above the Cellar for Any Other Type of Cooling System

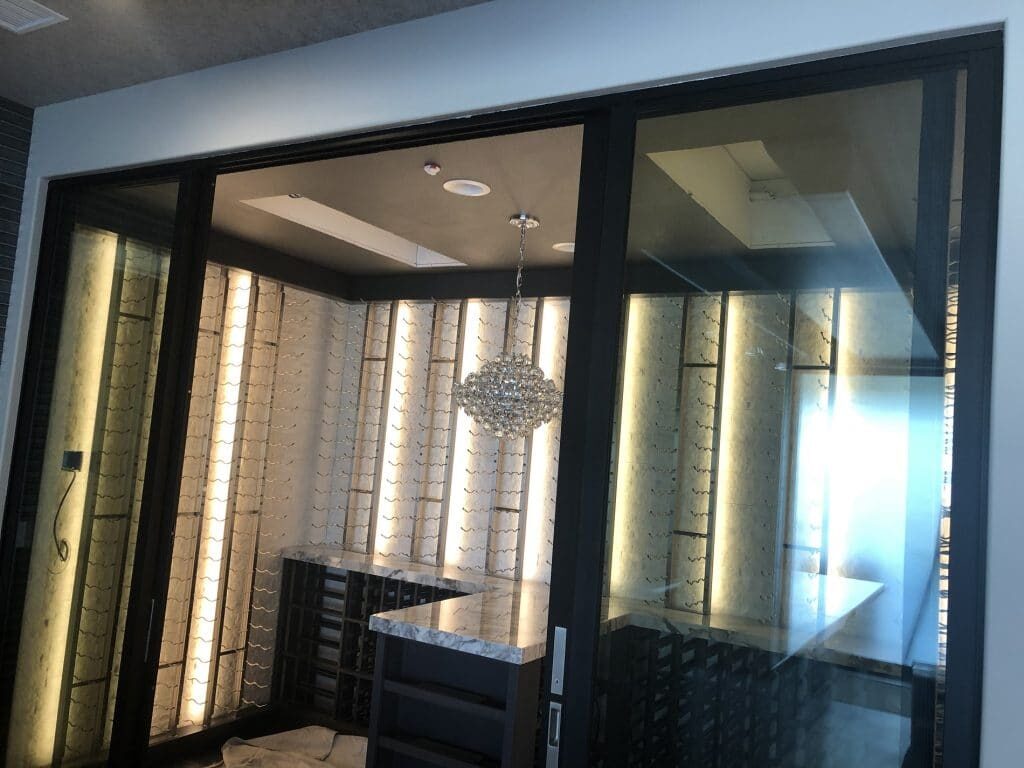
Home wine cellar where Mario Morales and his team installed a split system cooling unit in Los Angeles.
The client’s wine cellar was located on the first floor. On its ceiling was a very small space. This small space was not enough for the installation of any bulky or large equipment. Any cooling unit installation had to be inside the wine cellar.
2. Noise and Heat Were Factors
The wine cellar in this project was located right at the center of the client’s living space. This meant that the technicians could not install any equipment that would operate noisily. A split system cooling unit would be perfect since only the silent component (evaporator) will be inside the house.
In some cases where noise is a factor, a self-contained refrigeration system would have been another option. However, self-contained systems require an adjacent room for exhausting hot air. This project did not have any extra room for that purpose. Installing a self-contained system would have meant venting hot air into the client’s living space.
Step by Step Guide: How to Install a Split System Cooling Unit
Mario’s team concluded that the best refrigeration equipment for this wine cellar in Los Angeles was a split system cooling unit with two evaporator coils inside the cellar and one condenser outside the house. This is how they installed the equipment:
Step 1: Prepare a Concrete Pad Outside
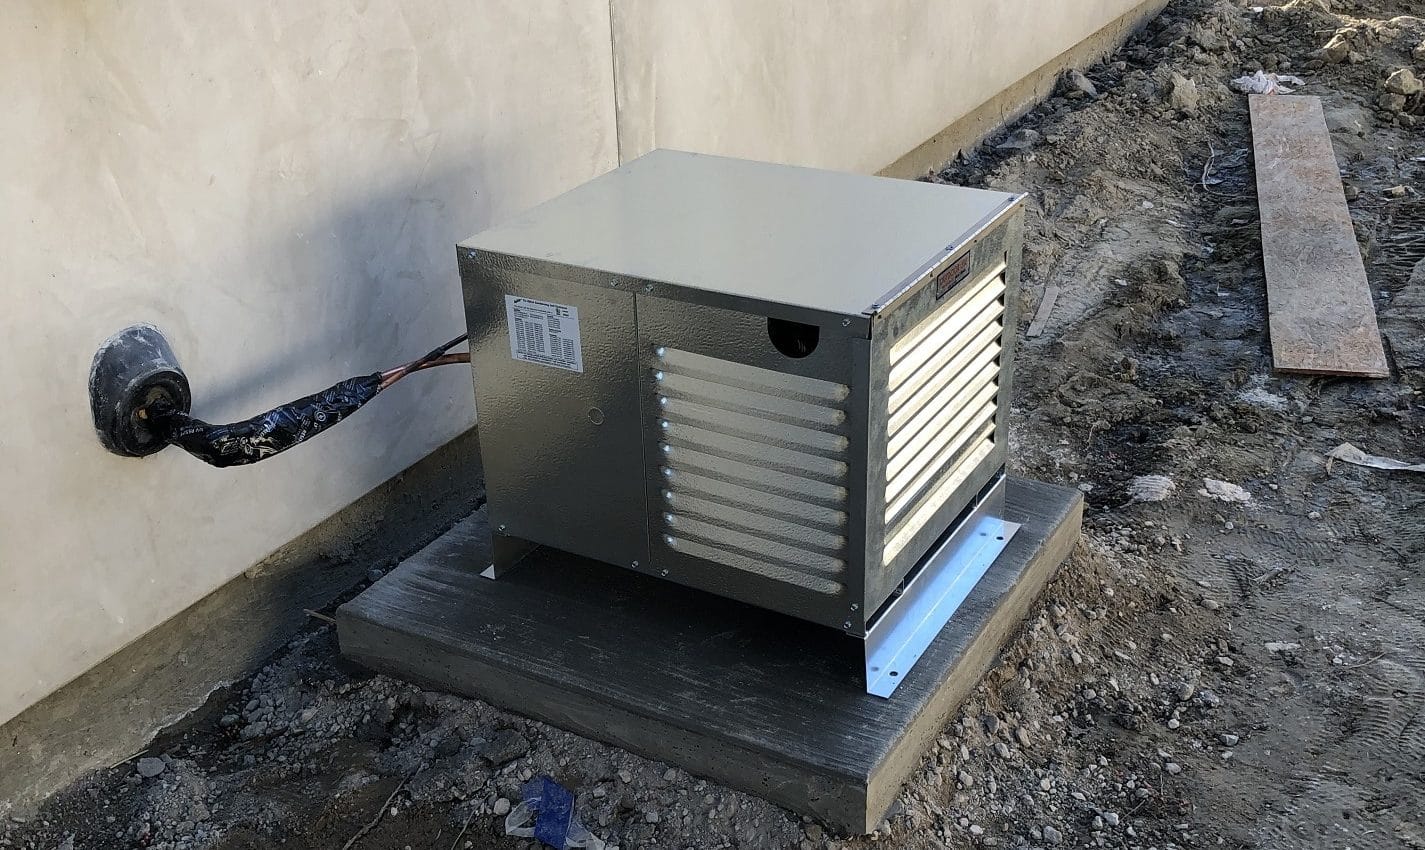
They picked an area outside the client’s house where they intended to set up the condenser unit. They laid down a concrete pad on where the condenser will be sitting.
Step 2: Connect the Line Set
They set up all the lines that connected the condenser outside to the evaporator inside.
Step 3: Set Up the Cooling System’s Power Source
Some cities require disconnect switches as the power source for a refrigeration system. In some other cities where disconnect switches aren’t required, a regular outlet will do. In this project, they installed disconnect switches above the line set.
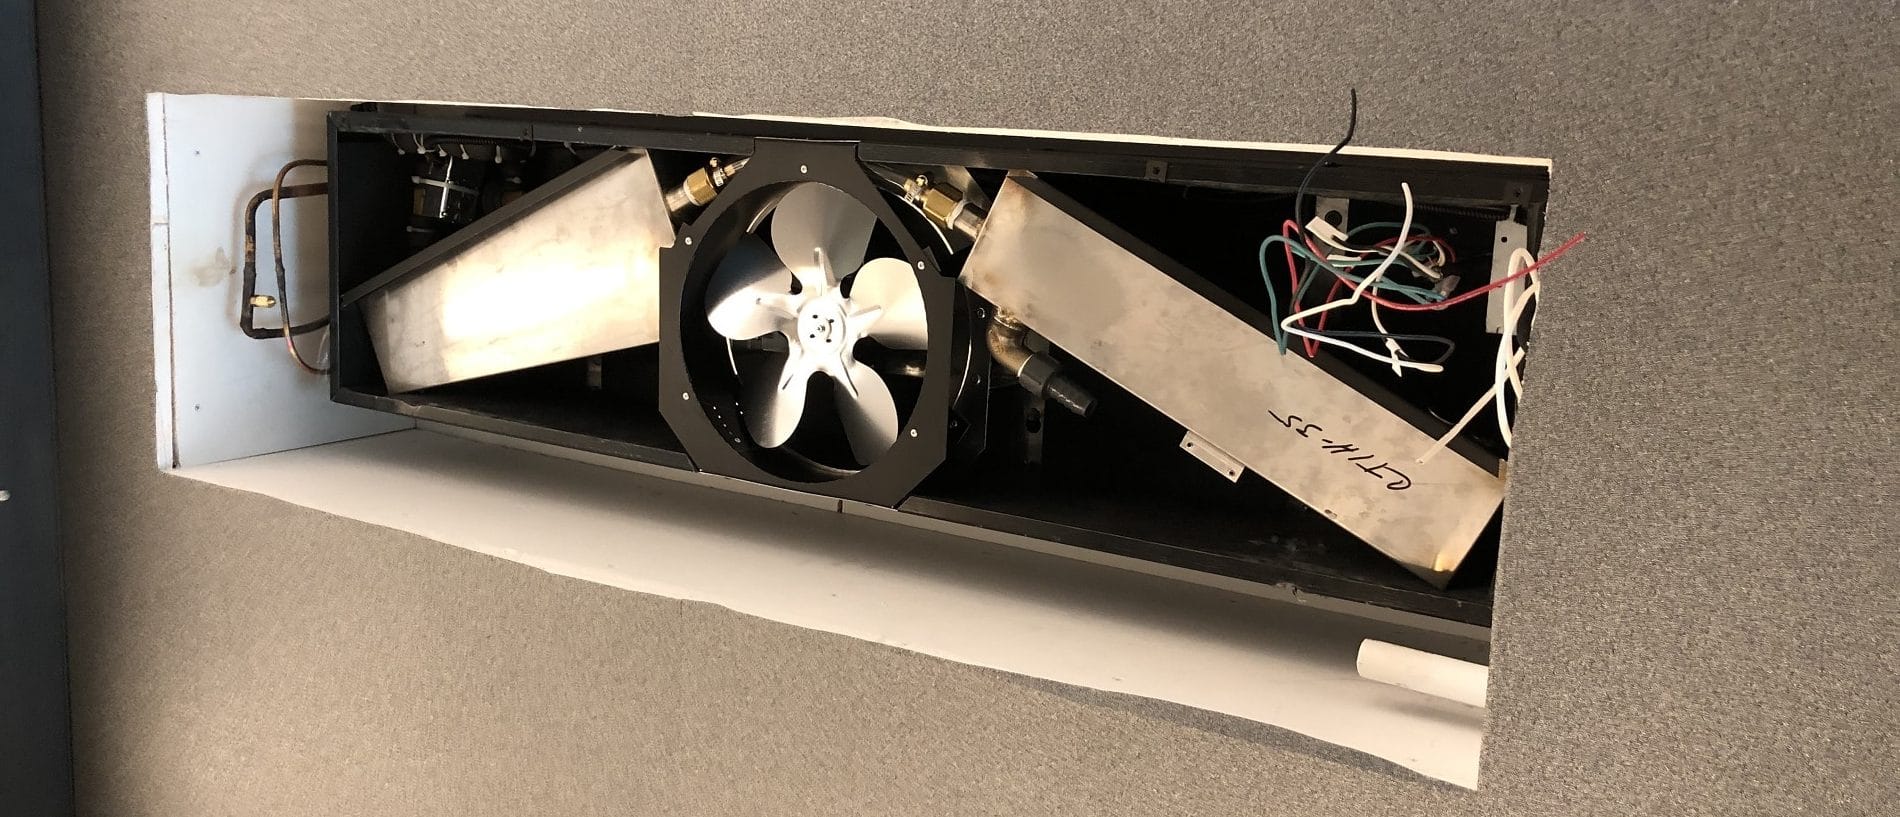
Step 4: Mounting the CTI-35 Evaporator Coils
They used two evaporator coils in this project, instead of one. The cellar needed the cooling capacity of one large evaporator, but because of limited space, Mario and his team had to find a compromise. They installed two CTI-35 evaporator coils. These two small coils could provide the same cooling capacity as one big one.
In this step, they also installed an access port, which will be used later on during the pressure test in Step 7.
Step 5: Configure the Pump and Drain for Condensation Drips
Right below the evaporator coils is draining pans that collect any condensation drips. These aluminum pans take the condensation to the primary drain, which leads them out of the system. Most refrigeration equipments come with a mini-condensate pump that is included by their manufacturer. The split system cooling unit in this project also had a mini-condensate pump that came with it. However, the team did not use that pump. Instead, they replaced it with a gravity drain, which they recommend using.
Step 6: Seal the Condenser Unit
The team mounted a platform on the concrete base that they laid down in Step 1. This platform was for the stainless steel enclosure that will cover the condenser unit. They soldered the enclosure to ensure that the refrigeration system is completely sealed.
Step 7: Perform Pressure Testing on the Split System Cooling Unit
All refrigeration unit installations must go through a pressure test so that they can make sure that the system has no leaks. They tested the Los Angeles split system cooling unit with 200 psi of nitrogen.
The access port installed in Step 4 plays an important part in this pressure test. This port was necessary to compare the pressure at the evaporator versus the pressure at the condenser. Without the access port, a technician would have to go back and forth from the evaporator inside to the condenser outside. The access port provides convenience, as well as accuracy in reading.
Need to Install a Split System Cooling Unit? Contact a Refrigeration Specialist!
There are a hundred things that could potentially go wrong if you install your split system cooling unit yourself. It is wise to hire an experienced refrigeration expert to help you. Wine Cellar Cooling Services Miami is here for you! Give us a call today at +1 (786) 633-2011!


